How To Make Gooseberry Jam
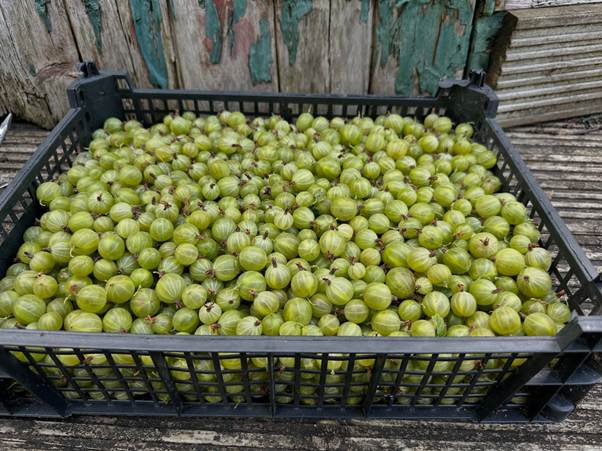
Gooseberries are on the delights of summer as far as I am concerned. They have a delicious tart, tangy flavour that is oddly combined with sweet, particularly if you can leave them on the bush for longer or have a purple variety. Jam is an excellent way to capture their unique taste to enjoy during the cold, winter months when the memory of fresh gooseberries has faded.
Making gooseberry jam is really easy to do as they are naturally high in pectin, meaning it is an easy jam to set. You do not need to add any pectin, and it makes for a simple recipe that anyone can make.

Essential Equipment
Before you start, let’s make sure you have all the equipment you need:
- Large saucepan – you need a large, heavy-bottomed pan or preserving pan. This needs to be large enough to hold the fruit and sugar with room to spare for when the jam boils. It can double in size, so you need plenty of room.
- Jars and lids – these need to be sterile to ensure the jam does not mould and spoil. Wash them in hot soap water, rinse them well and then put them in a low oven at 120°C/250°F for at least 15 minutes. I tend to do this as I start making the jam.
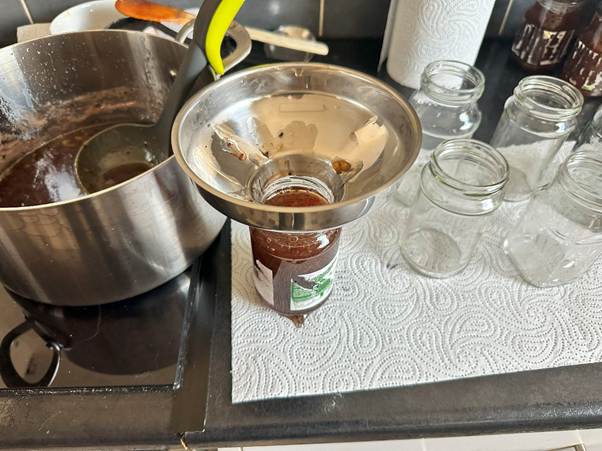
- Jam funnel – this is optional, but I highly recommend it as it makes filling jam jars a lot less messy.
- Long-handled wooden spoon – important for stirring the jam. Avoid metal as it can sometimes impart a metallic flavour on the jam.
- Sugar thermometer – this is optional and useful for monitoring the temperature, but not necessary if you know how to check the setting point.
- Small plates – put in the freezer for testing whether the jam is set.
- Potato masher – used for breaking up the fruit.
The Ingredients
This recipe uses the standard jam ratio that brings out the flavour of the gooseberries. The gooseberries need to be topped and tailed, which means removing any stalks or blossom. This is important as it is vital for a smooth jam. Enlist help or sit in front of the TV and do it as it can take a while. Just pinch the stalk and blossom off with your fingers. Don’t worry if you damage the gooseberry doing it, you will be mashing them shortly anyway.
- 1kg/2.2lbs gooseberries (washing and topped and tailed)
- 1kg/2.2lbs granulated (white) sugar
- A knob of butter (optional – used to reduce foam on the jam)
The Method
This is a really easy jam to make and there is a video you can watch (below) that walks you through it.
- Put the small plates in your freezer and the jars/lids into your oven at 120°C/250°F.
- Put the gooseberries in your preserving pan, add about 150ml/½ cup water and then simmer on a medium heat for 10-15 minutes until the gooseberries start to burst. Use your potato masher to help them along their way and create a pulpy consistency.
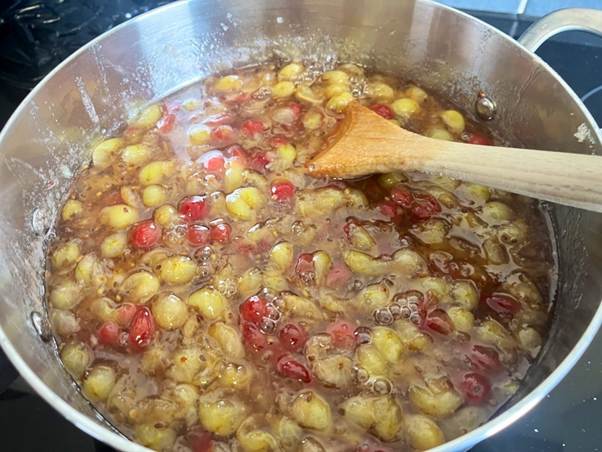
- Once the fruit is soft, add the sugar to the pan and stir continuously over a low heat until the sugar has completely dissolved. This is crucial as it stops the jam crystalising later on. Take your time here and keep stirring until you cannot feel the grainy texture of the sugar on the bottom of the pan while stirring.
- Once the sugar has dissolved, turn the heat up and bring the mixture to a rolling boil. As the jam boils, use a large spoon to skim off the foam that forms.
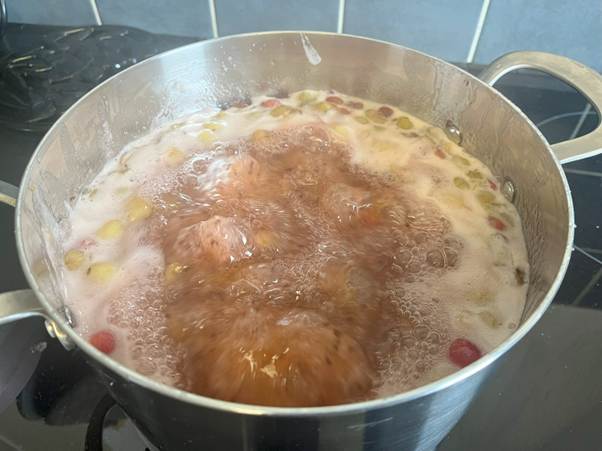
- Gooseberry jam typically reaches its setting point at around 104-105°C (219-221°F). If you’re using a thermometer, boil until this temperature is reached and test for the set. Alternatively, perform the wrinkle test. You know when the jam has set as the boil changes from a rolling boil to the sort of boil you would expect to see in a lava lake! Watch the video to see what I mean.
- Remove a small plate from your freezer and remove the jam from the heat.
- Put a teaspoon of the jam onto the plate.
- Return the plate to the freezer and leave it for a minute or two.
- Take the plate out and push the jam with your finger, if the surface wrinkles, then the jam is ready, otherwise boil the jam for another few minutes and test again.
- If you want to get rid of some of the foam, add some butter, though this is optional.
- Carefully ladle the jam into the sterilised jars, leaving a small amount of space at the top and seal the jars tightly. As the jam cools, it will create a vacuum seal in the jar. Use an oven glove or something similar to hold the jars as they will be very hot.
- Once the jam has cooled completely, label them and store in a cool, dark cupboard. When you have opened a jar, store it in your refrigerator.
Gooseberry jam is really easy to make and absolutely delicious. It is by far my favourite jam and I look forward to my gooseberry harvest every single year.